Silvanon Art
See the Map
Orchard Messagepost
Contact Information

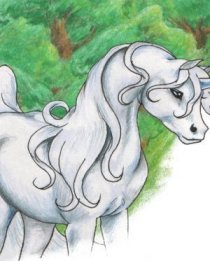
Drawing Tutorials: Polygon Horse
This tutorial shows a method of drawing an equine using polygons, circles and lines. Steps of this tutorial that are similar to the circle horse will be shortened or skipped, so if you have not yet looked at the circle horse tutorial, I suggest you do before proceeding.
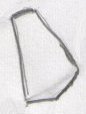
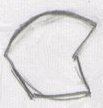
Start off by drawing the polygon shown below. This will be the shoulder of your horse.
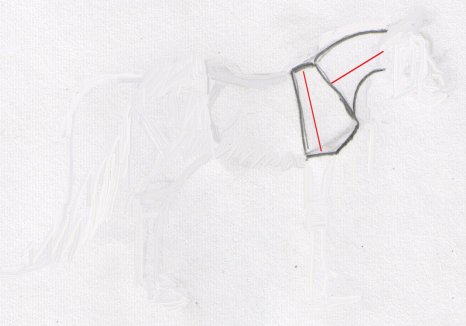
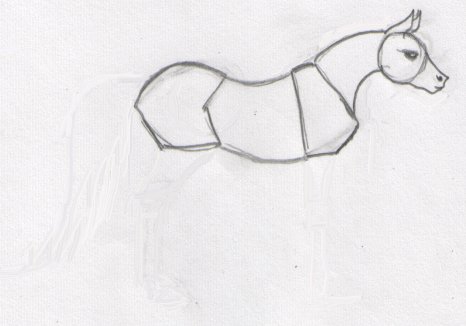
Next I like to draw the neck. Notice how the top line of the neck connects right at the corner of the shoulder polygon. The bottom line of the neck connects slightly above it's corner, though. Notice how the two red lines are approximately the same lenght.
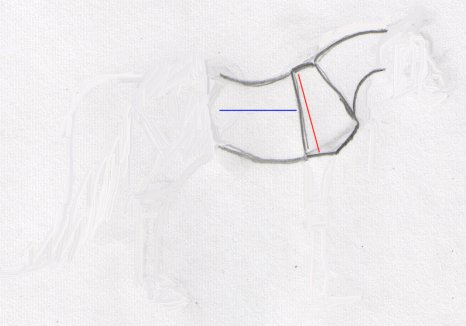
Now draw the body. Notice how the body lines connect right at the corners of the shoulder polygon, and that the back end of the body lines tapers slightly (the chest area is thicker than the flank area). The red and blue lines are about the same length.
Next draw the back end of the horse. I usually start with a circle. On the rear end, though, slightly above the half-way point of the circle, draw a straight line angling a little more steeply in towards the body. Take that line down to the same height as the bottom body line, then draw a new line cutting straight over. Finally, you may draw a sideways "V" shape between where the flank polygon touches the top & bottom body lines. Notice how the points of the rear end and the flank line up, as shown by the red line. (Ah! Look at that sweet flowing curvy back line--that's what you're looking for! The withers and flank should stand up a bit above the rest of the back, the flank is nice and rounded, whereas the withers are shorter and more pronounced.)

About now you can stop and add on the head. This process is the same as what I showed in the circles tutorial. (Although I drew the mouth in as I was drawing the nose this time--I'll show a close up of the head at the end of this tutorial so you can see the flow of the lines better.)
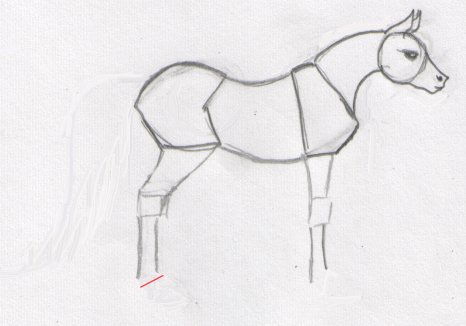
Now let's add on some legs. This is basically the same as the circles tutorial. Note that you can use squares for the knees if you like--the front knees especially do tend to be boxy on real horses. Note that this time I didn't draw circles or boxes for the ankles. Instead, I simply stopped the lower legs at the appropriate place. Notice that the front and back lines of the lower legs didn't end at the same height--rather, the end in the same angle as we'll see on the top line of the hoof triangle in a minute.
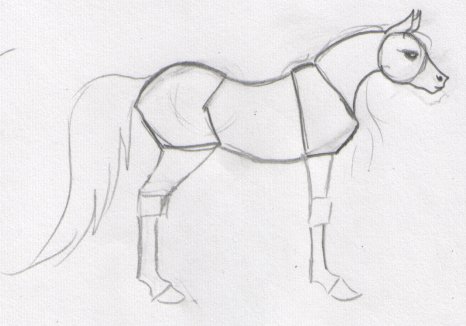
Add on the last bit of the leg, like we did in the cirlce tutorial. Notice how the top of the hoof and the ankle are at the same angle. Add in a mane and a tail, and you're ready to do the final cleanup. Cleanup would proceed similiar to that shown in the circle tutorial.
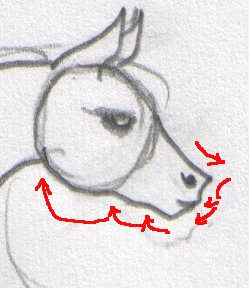
Here's a close up of the head. Notice the subtle curves around the end of the nose, and along the underside of the head, as accented by the red lines.
Page last updated: Mon, Aug. 4, 2003
Page made: Mon, Aug. 4, 2003
All images, content and layouts © Copyright Silvanon 2003, unless otherwise identified. No images or content on this site may be used without express written permission.
. . . . . . . . . . . . . . . . . . . . . . . . . . . . . . . . . . . . . . . . . . . . . . . . . . . . . . .. . . . . . . . . . . . . . . . . . . . . . . . . . . . . . . . . . . . . . . . . . . . . . .. . . . . . . . . . . . . . . . . . . . . . . . . . . . . . . . . . . . . . . . . . . .. . . . . . .. . . . . . . . . . . . . . . . . . . . . . . . . . . . . . . . . . . . . . . . . . . . . . . . . . . . . . . . . . . . . . . . . . . . . . . . . . . . . . . . . . . . . . . . . . .. . . . . . . . . . . . . . . . . . . . . . . . . . . . . . . . . . . . . . . . . . . . . . .. . . . . . . . . . . . . . . . . . . . . . . . . . . . . . . . . . . . . . . . . . . .. . . . . . .. . . . . . . . . . . . . . . . . . . . . . . . . . . . . . . . . . . . . . . . . . . . .. . . . .. . . . . .. . . . . .. . . . . . . .. .