
This tutorial is demonstrated with Photoshop CS, but the methods can be adapted to Paint Shop Pro and other similar programs.
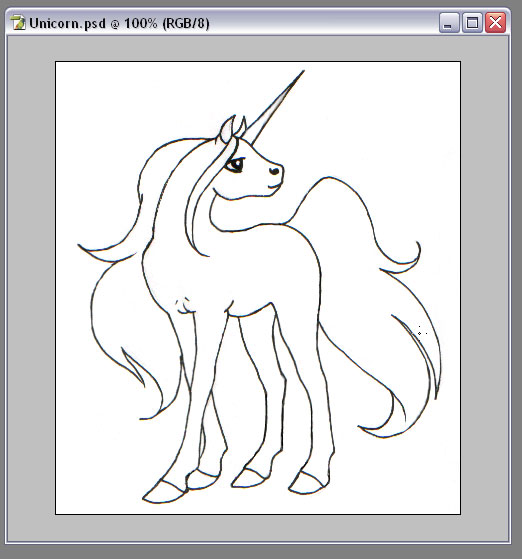
Step 1: Start out with an outline to color. Here's a freshly scanned outline:
Step 2: Clean the outline. I like to use a white pencil tool in the white areas, and the smudge brush at high opacity around the edges of the outline. Here's my cleaned outline:
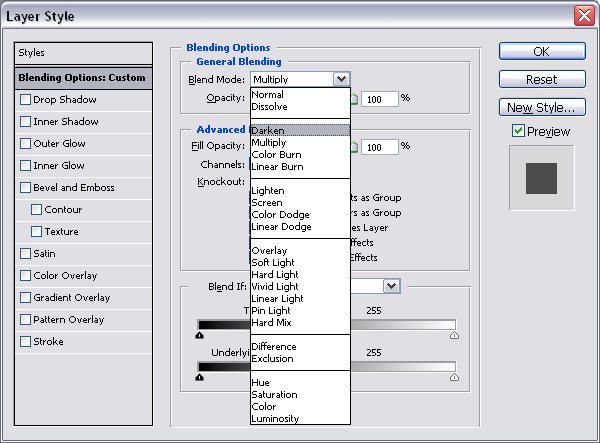
Step 3: Make a background layer under your outline and paint it solid white (or whatever color you want the background to be). Now, on your outline layer, change the blending option to Darken. In photoshop, right click on the layer and select Blending Options. Then change the Blend Mode to Darken.
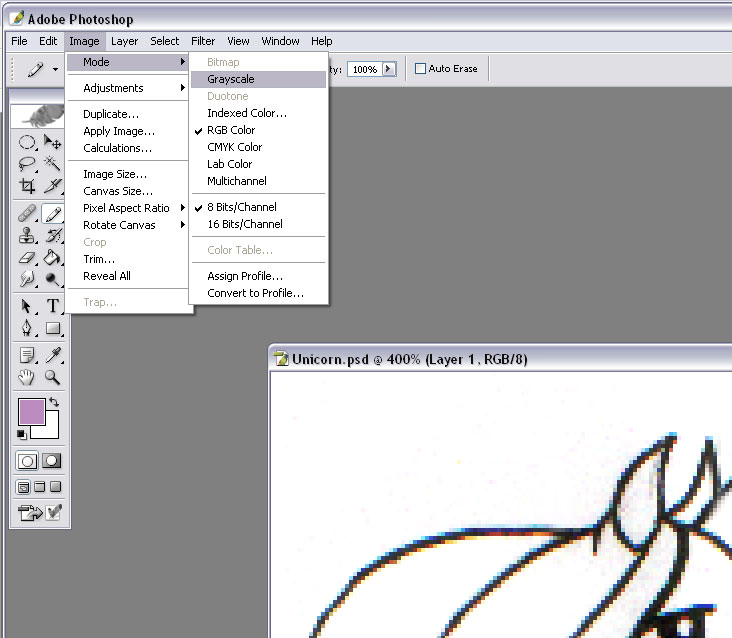
Step 4: Change the image to Grayscale. This will remove random color fragments from scanned outlines
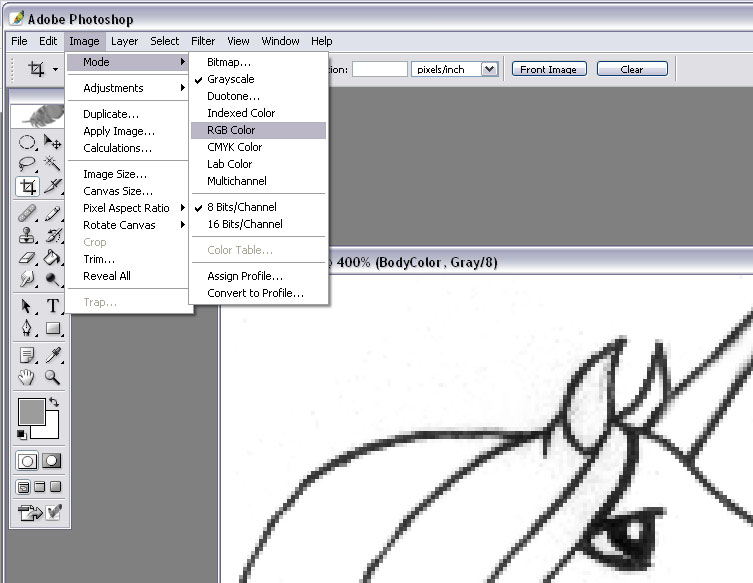
Step 5: Change the image back to RGB. The color fragments will be gone from the outline, and now you can color it in color.
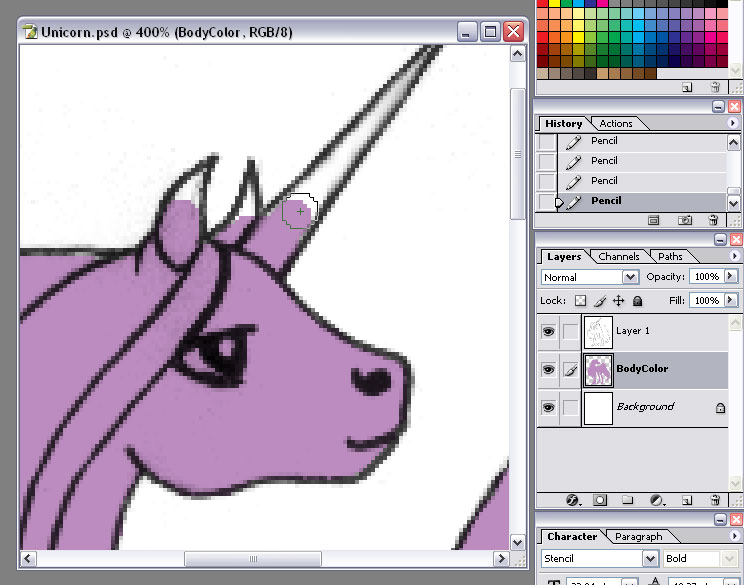
Step 6: Make a new layer for your base body color. I call it BodyColor Put the layer in between the outline layer and the background layer. Use the pencil tool to color in the entire outline. Make sure to color in everything, but don't color outside the outline.
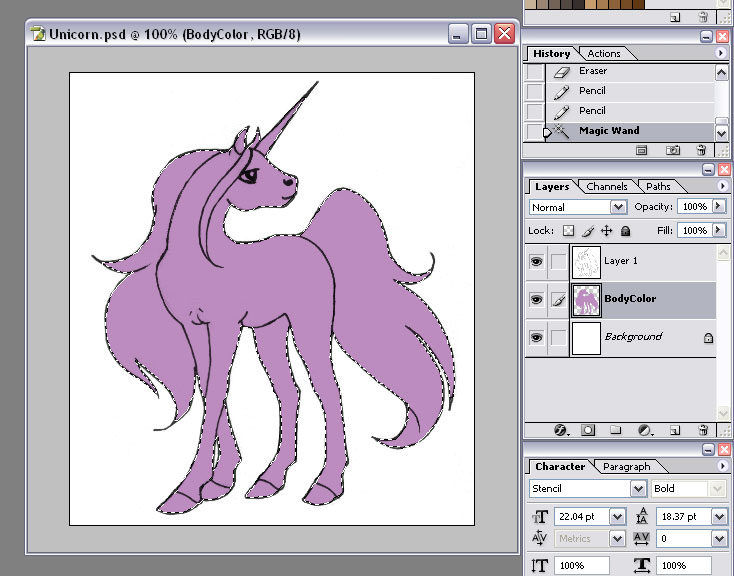
Step 7: Use the magic wand on the BodyColor layer to select the entire outline. Keep this selection in place through all the following steps.
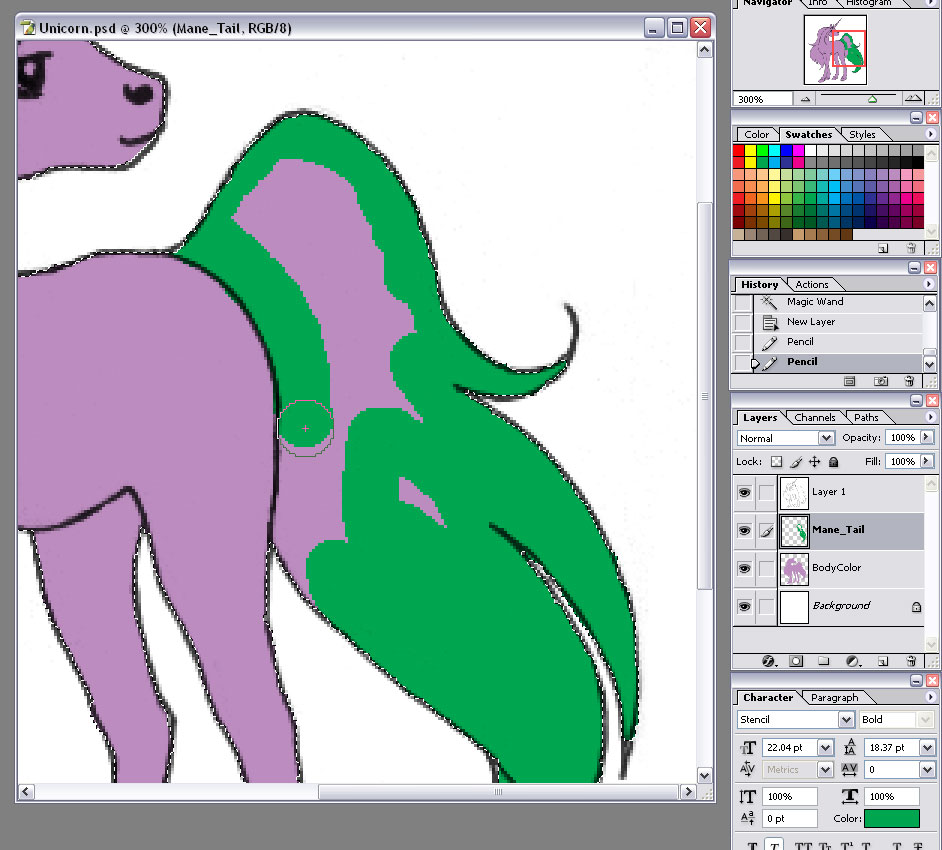
Step 8: Make a new layer for a component of the outline that's going to be a color different from the base color. This layer should be above the BodyColor layer, but below the outline layer. On that layer, use the pencil tool to color in just that component. In the screenshot I am coloring in the Mane & Tail.
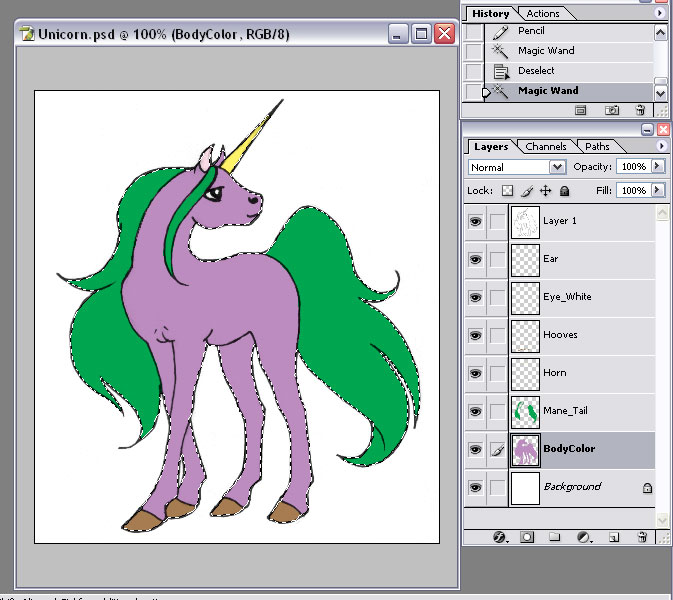
Step 9: Make new layers for each component of the critter that's a different color, and use the pencil tool to color each one. All should be above the BodyColor layer and below the outline layer.
Step 10: Make a new layer on top of all the color layers, but below the outline layer, and name it Shadows. Now use the pencil tool, select black as your color, and set the opacity low. (In photoshop I like around 20% opacity). Color in where the shadows will go. Don't worry about being totaly precise, and don't worry about making it smooth. Areas with just a little shadow, only go over once. Darker areas go over until they're as dark as you'd like. Use a big sized cursor for the larger areas, and smaller for the more detailed ones. For a richly shaded look, put shading on most of the critter. It'll look rather ugly after this step.
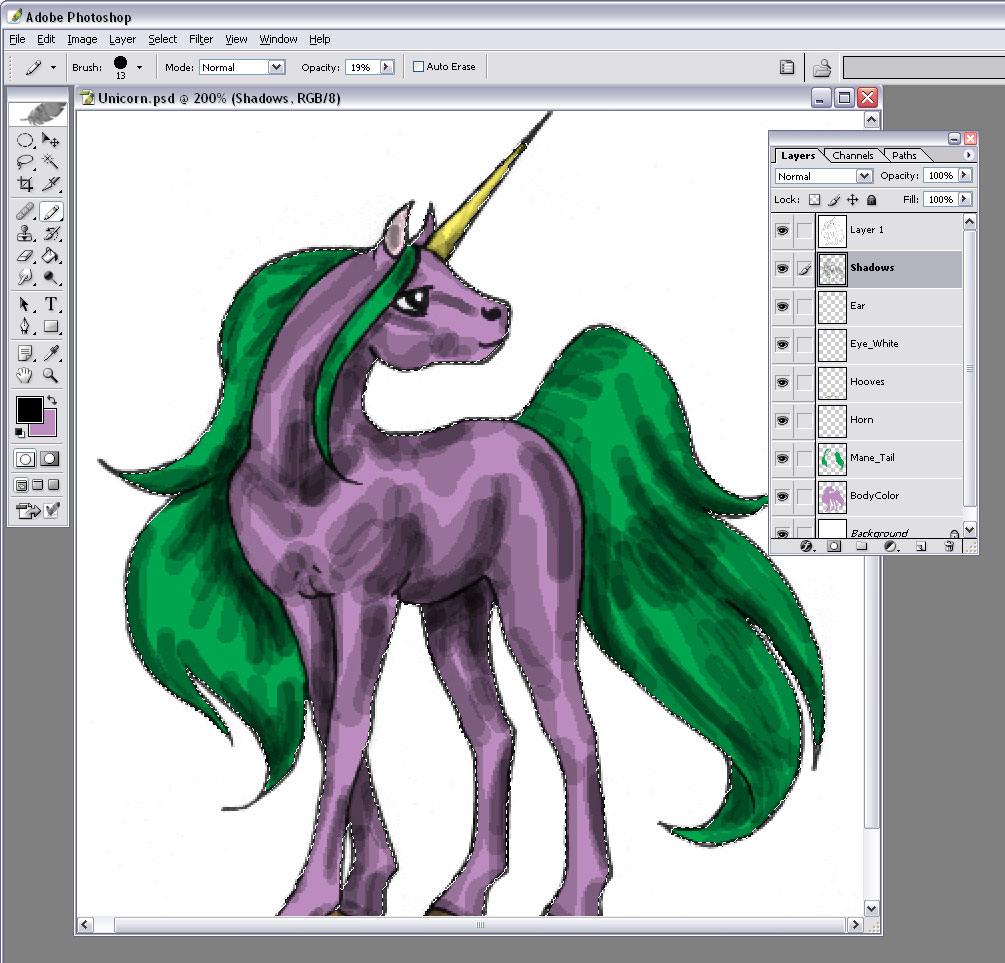
Step 11: Now it's time for the smudge-brush magic. Use the smudge brush with a brush size a little larger than what you used to put in the shading. Go over everywhere that you put shading, and smooth it all out. You can use the smudge brush to push around the shading if it didn't get it quite the right spot originally.

Step 12: Take a moment to admire your finished shading. If you notice any spots you forgot to smooth/smudge, go back and do them:

Step 13: Now make a layer on top of the Shadows layer, and name it Highlights. On the Highlights layer, use the pencil tool with pure white selected, and a smaller cursor size than you used with the shading. Also put the opacity up more. I like around 40% in Photoshop. Put in white highlighting everywhere the shading didn't go. Again it'll be blocky & ugly.
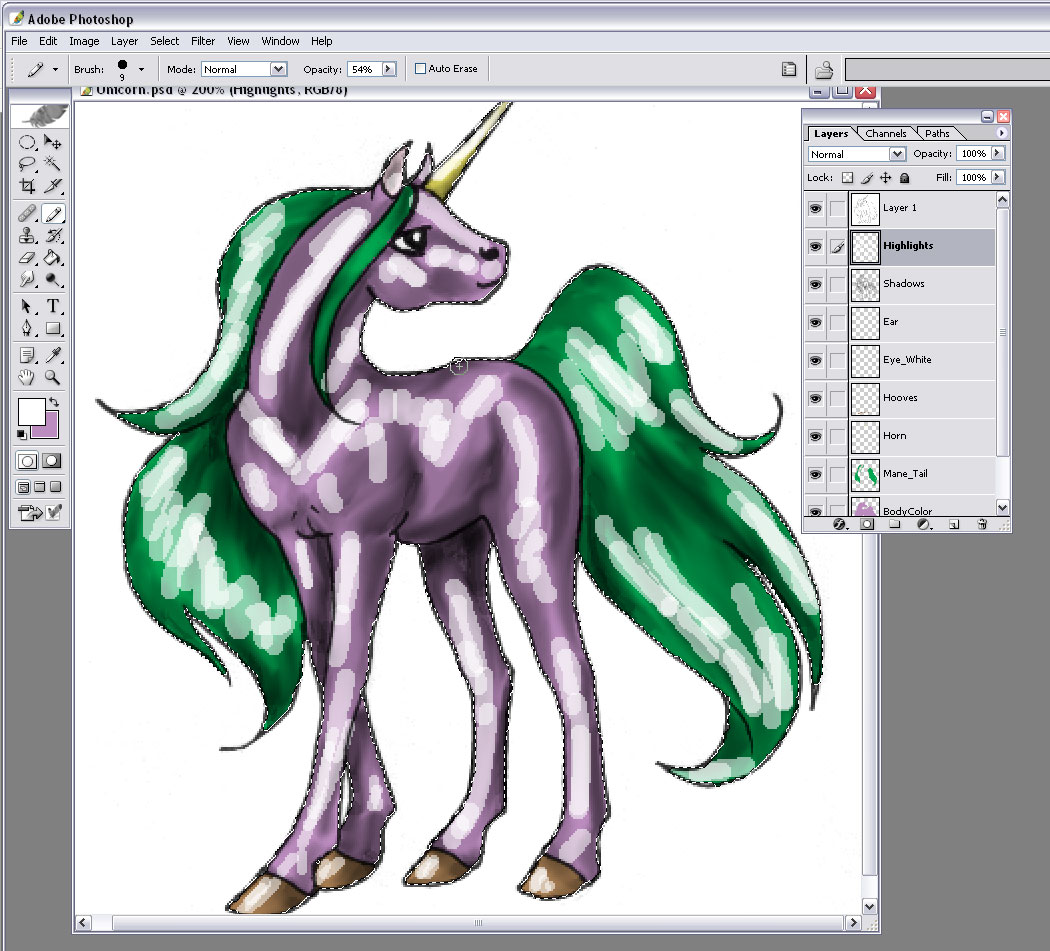
Step 14: Do some smudge-brush magic on the highlight layer. Again make sure to go over everywhere you put highlighting.
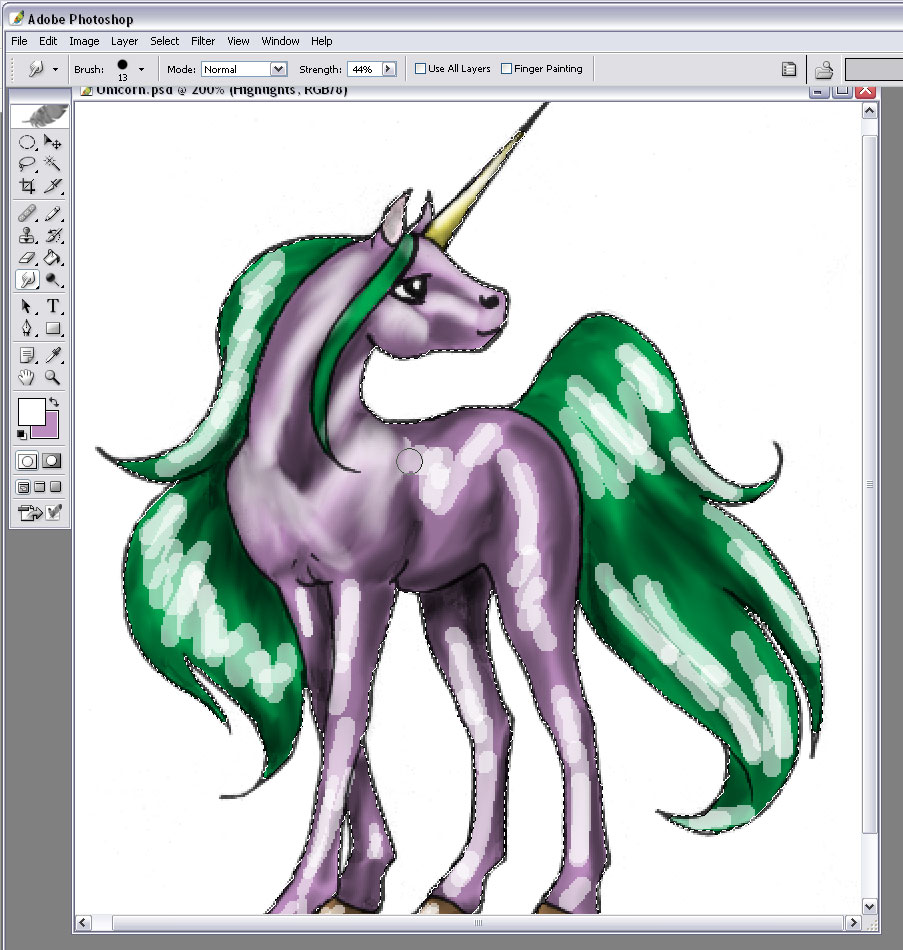
Step 15: Take another moment to admire your finished highlighting. Look for spots you might have missed:
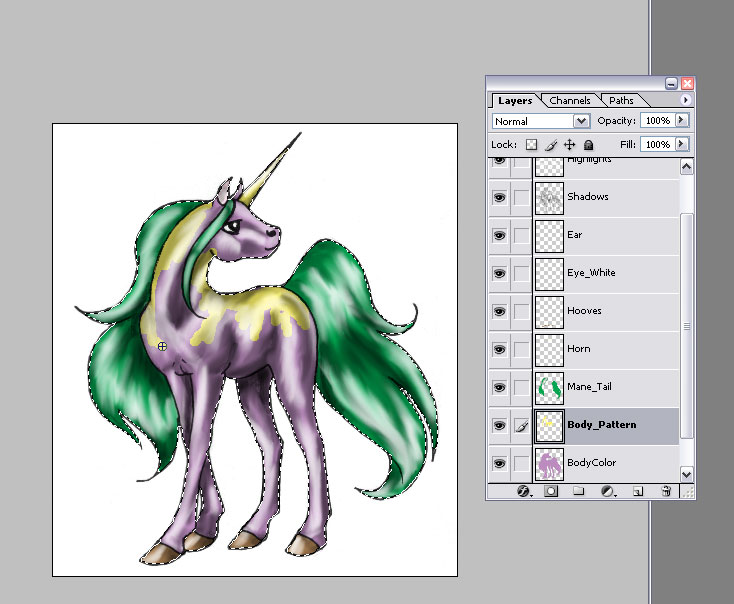
Step 16: Now it's time to put in fun patterns. Make a layer right above the component you're going to put patterning on, and then use that component's color layer to select just the component area. Then, on the component pattern layer, color in your pattern:
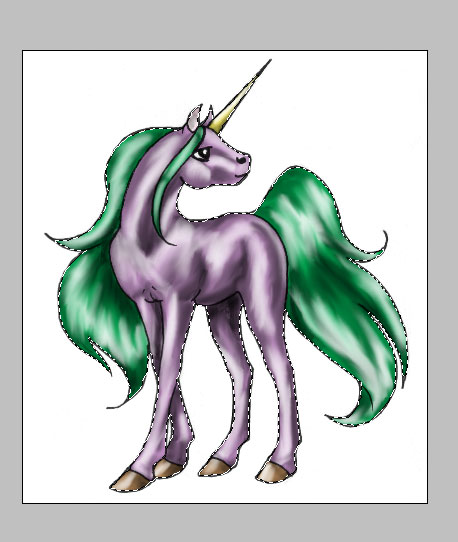
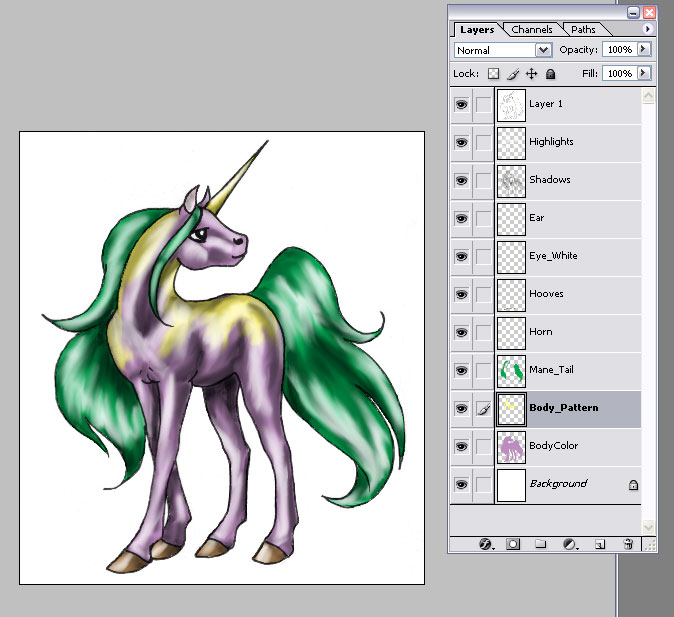
The smudge brush can work magic on patterning layers as well. Here's our finished product:
Using layers like we did makes it very easy to change the colors of our critter. For example, if I decided I wanted the body color to be blue, I could select the BodyColor layer with the magic wand, and then paint that layer blue. All my shading and other coloring will remain intact, and just the body color will change blue.
Page last updated: Fri. Jun. 2, 2006
Page made: Fri. Jun. 2, 2006